jquery实现直播视频弹幕效果
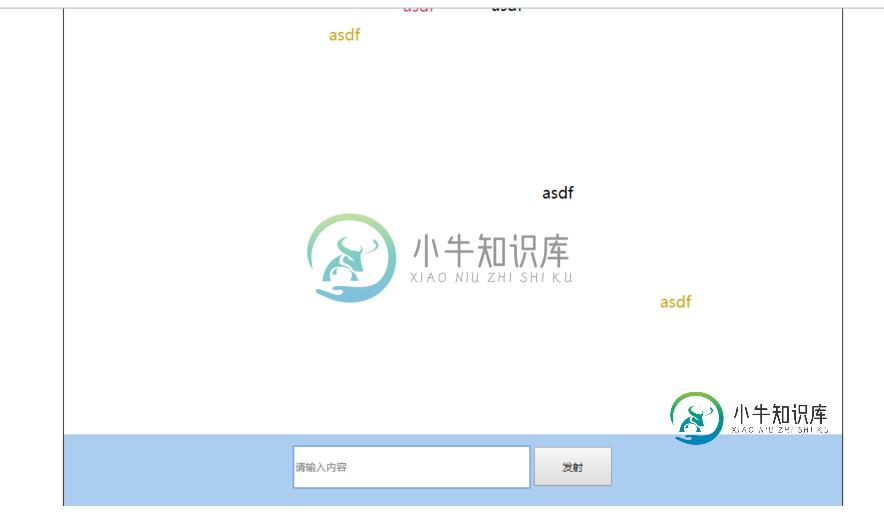
JQ实现弹幕效果,快来吐糟你的想法吧

代码如下,复制即可使用:
<!DOCTYPE html>

<html>

 <head>

  <meta charset="utf-8" />

  <title>JQ实现弹幕效果</title>

  <style type="text/css">

   *{

    padding: 0;

    margin: 0;

   }

   #box{

    height:700px;

    width:1000px;

    margin: 0 auto;

    border:1px solid #000000;

    position: relative;

   }

   #main{

    width:100%;

    height:605px;

    position: relative;

    overflow: hidden;

   }

   p{

    position: absolute;

    left:1000px;

    width:200px;

    top:0;

   }

   #bottom{

    width:100%;

    height:80px;

    background: #ABCDEF;

    text-align: center;

    padding-top: 15px;

    position: absolute;

    left: 0;

    bottom: 0;

   }

   #txt{

    width:300px;

    height:50px;

   }

   #btn{

    width:100px;

    height:50px;

   }

  </style>

 </head>

 <body>

  <div id="box">

   <div id="main">


   </div>

   <div id="bottom">

    <input type="text" id="txt" placeholder="请输入内容" />

    <input type="button" id="btn" value="发射" />

   </div>

  </div>

  <script src="http://libs.baidu.com/jquery/1.9.1/jquery.js"></script>

  <script type="text/javascript">

   $(function(){

    var pageH=parseInt($("#main").height());

    var colorArr=["#cfaf12","#12af01","#981234","#adefsa","#db6be4","#f5264c","#d34a74"];

    $("#btn").bind("click",auto);

    document.onkeydown=function(e){

     if(e.keyCode == 13){

      auto();

     }

    };

    function auto(){

     var $value = $("#txt").val();

     $("#main").append("<p>" + $value + "</p>");

     $("#txt").val("");

     var _top=parseInt(pageH*(Math.random()));

     var num=parseInt(colorArr.length*(Math.random()));

     $("p:last-child").css({"top":_top,"color":colorArr[num],"font-size":"20px"});

     $("p:last-child").animate({"left":"-200px"},10000);

     $("p:last-child").stop().animate({"left":"-300px"},10000,"linear",function(){

      $(this).remove();

     });

     //console.log($value);

    };


   })

  </script>

 </body>

</html>
实例扩展:
<!doctype html>
<html>
<head>
  <meta charset="utf-8">
  <title></title>
  <style type="text/css">
    html, body {
      margin: 0px;
      padding: 0px;
      width: 100%;
      height: 100%;
      font-family: "微软雅黑";
      font-size: 62.5%;
    }

    .boxDom {
      width: 100%;
      height: 100%;
      position: relative;
      overflow: hidden;
    }

    .idDom {
      width: 100%;
      height: 10%;
      background: #666;
      position: fixed;
      bottom: 0px;
    }

    .content {
      display: inline-block;
      width: 460px;
      height: 40px;
      position: absolute;
      left: 0px;
      right: 0px;
      top: 0px;
      bottom: 0px;
      margin: auto;
    }

    .title {
      display: inline;
      font-size: 4em;
      vertical-align: bottom;
      color: #fff;
    }

    .text {
      border: none;
      width: 300px;
      height: 30px;
      border-radius: 5px;
      font-size: 2.4em;
    }

    .btn {
      width: 60px;
      height: 30px;
      background: #f90000;
      border: none;
      color: #fff;
      font-size: 2.4em;
    }

    span {
      height: 40px;
      position: absolute;
      overflow: hidden;
      color: #000;
      font-size: 4em;
      line-height: 1.5em;
      cursor: pointer;
      white-space: nowrap;
    }
    #boxDom video{
      width: 80%;
      height: 90%;
      float: left;
    }
    #boxDom .list-info{
      width: 20%;
      height: 90%;
      float: left;
      background-color: #666;
      overflow-y: auto;
      overflow-x: hidden;
      position: relative;
      z-index: 999;
    }
    .list-info p{
      font-size: 15px;
      line-height: 20px;
      border-bottom: 1px dashed #ccc;
      text-indent: 2em;
      color: #fff;
    }

  </style>
</head>
<body>
<div class="boxDom" id="boxDom">
  <video controls="controls" src="movie/10_2fdd2bbcd15c68497744f07d4527cef2_3.mp4"></video>
  <div class="list-info"> </div>
  <div class="idDom" id="idDom">
    <div class="content">
      <p class="title">吐槽:</p>
      <input type="text" class="text" id="text"/>
      <button type="button" class="btn" id="btn">发射</button>
    </div>
  </div>
</div>
<script src="js/jquery-1.12.4.js"></script>
<script>
 //生成随机颜色
  var randomColor=function(){
    var r= Math.floor(Math.random()*257);
    var g= Math.floor(Math.random()*257);
    var b= Math.floor(Math.random()*257);
    return "rgb("+r+","+g+","+b+")";
  }
  //定义数组保存弹幕
  var saveDan=[],index=0,tm;
  //弹幕自动移动方法
  var autoAnimate=function(){
    index++;
    index>saveDan.length-1 && (index=0);
    saveDan[index].appendTo($("#boxDom")).animate({
      "right":$(document).width(),
    },10000,function () {
      $(this).css("right",$(".list-info").width()-$(this).width()).remove();
    });
  }
  //点击创建弹幕
  $("#btn").click(function () {
    var txt=$("#text");
    var randomTop=Math.floor(Math.random()*($("#boxDom video").height()-40));
    if(txt.val().trim().length==0)return;
    var span= $("<span></span>").text(txt.val()).css({
      "color":randomColor(),
      "top":randomTop,
      "right":$(".list-info").width(),
      "z-index":888
    });
    saveDan.unshift(span);//将新的弹幕添加到数组内容的前面
    //添加弹幕列表
    $("<p></p>").text(txt.val()).css("color",randomColor()).prependTo($(".list-info"));
    txt.val("");//清空文本框
    //自动跑起来
    clearInterval(tm);
    index=saveDan.length-1
    tm=setInterval(autoAnimate,1000);
  });
  //enter键确认发送
  $(document).keydown(function (e) {
    var e=e||window.event;
    e.keyCode==13 && ($("#btn").click());
  });
</script>
</body>
</html>
到此这篇关于jquery实现直播视频弹幕效果的文章就介绍到这了,更多相关JQ实现弹幕效果内容请搜索小牛知识库以前的文章或继续浏览下面的相关文章希望大家以后多多支持小牛知识库!
-
本文向大家介绍jquery实现直播弹幕效果,包括了jquery实现直播弹幕效果的使用技巧和注意事项,需要的朋友参考一下 本文实例为大家分享了jquery直播弹幕展示的具体代码,供大家参考,具体内容如下 理论知识: 实现效果主要涉及jq对节点的操作,以及动画函数的使用… 思路: 1.获取到评论文本框的值,对文本内容进行处理 2.动态创建一条弹幕,将创建的弹幕动态的添加到需要显示的页面,并同时创建一条
-
本文向大家介绍jQuery实现弹幕效果,包括了jQuery实现弹幕效果的使用技巧和注意事项,需要的朋友参考一下 效果如下: 代码如下: 以上就是本文的全部内容,希望本文的内容对大家的学习或者工作能带来一定的帮助,同时也希望多多支持呐喊教程!
-
本文向大家介绍jQuery实现弹幕特效,包括了jQuery实现弹幕特效的使用技巧和注意事项,需要的朋友参考一下 案例简介 jQuery实现弹幕效果,代码如下。 案例目录 HTML部分 CSS部分 效果展示 以上就是jQuery实现弹幕效果的代码,希望对您有帮助! 源码下载:jQuery弹幕 以上就是本文的全部内容,希望对大家的学习有所帮助,也希望大家多多支持呐喊教程。
-
本文向大家介绍基于jquery实现弹幕效果,包括了基于jquery实现弹幕效果的使用技巧和注意事项,需要的朋友参考一下 用jquery写的一个弹幕,供大家参考,具体内容如下 效果图: 源码: 以上就是本文的全部内容,希望对大家的学习有所帮助,也希望大家多多支持呐喊教程。
-
本文向大家介绍简单实现jQuery弹幕效果,包括了简单实现jQuery弹幕效果的使用技巧和注意事项,需要的朋友参考一下 在要写一个弹幕案例的时候,首先要清楚每一步要干什么。 首先搭好框架之后在要发送弹幕时应该准备进行如下步骤: 获取到要发送到弹幕上的内容,即获取到文本框输入的内容。通过jquery的var str = $(“#文本框的id”).val(); 生成一个元素:利用jQuery的 var
-
本文向大家介绍jQuery实现简单弹幕效果,包括了jQuery实现简单弹幕效果的使用技巧和注意事项,需要的朋友参考一下 本文实例为大家分享了jQuery实现弹幕效果的具体代码,供大家参考,具体内容如下 话不多说吧,直接看效果吧: 主要思路 其实弹幕的主要思路很简单,就是将div从右向左移动,直到完全移除屏幕之后,将当前div从body中移除,这里我采用了面向对象的思想来处理,具体js代码如下: J

