jQuery模拟实现天猫购物车动画效果实例代码
一、功能描述:
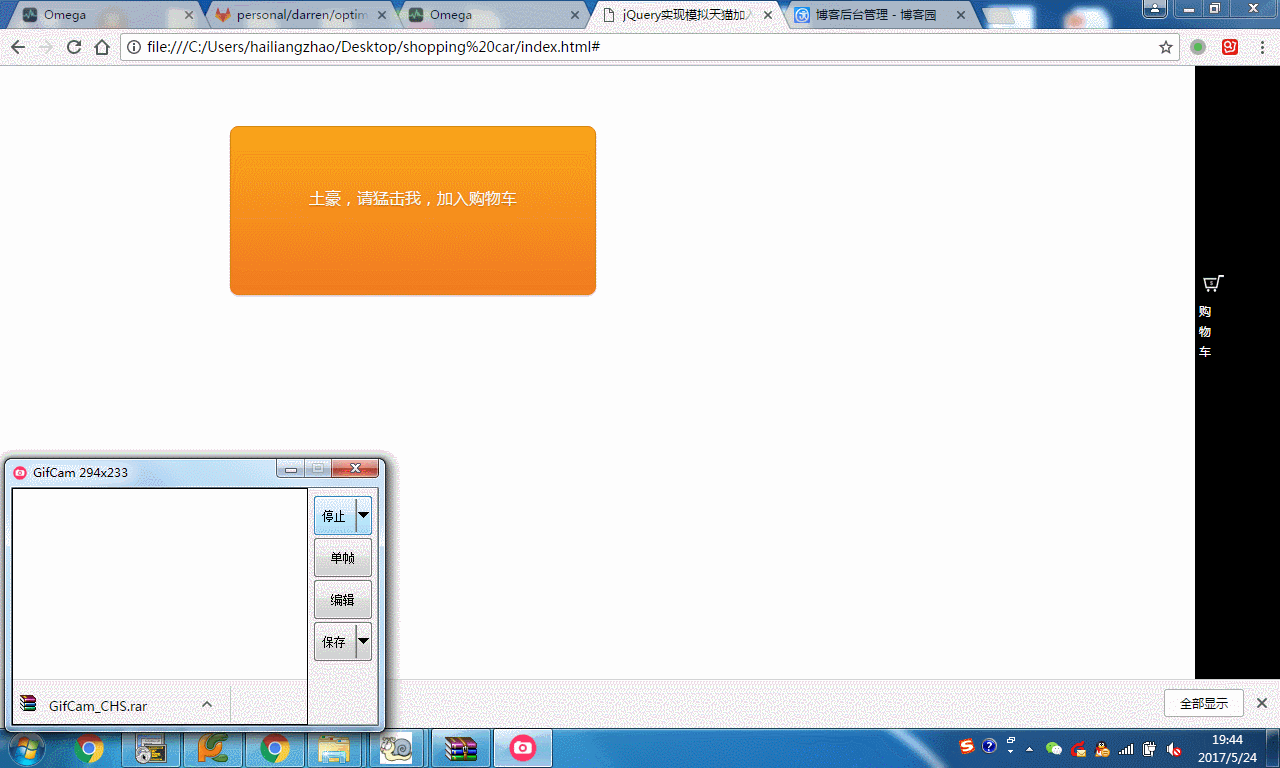
1、点击购买按钮,模拟抛物线将物品弹到购物车里;
2、购物车添加物品后,显示+1动画;
效果图如下:

实现如下:
1、导入jquery相关的包:
<script type="text/javascript" src="jquery-2.1.1.min.js"></script>
<script src="jquery.fly.min.js"></script>
2、html文件内容:
<!DOCTYPE HTML>
<html>
<head>
<meta charset="utf-8">
<meta name="viewport" content="width=device-width, initial-scale=1, maximum-scale=1">
<title>jQuery实现模拟天猫加入购物车飞入动画效果</title>
<meta name="keywords" content="jquery,购物车" />
<body>
<div id="main">
  <div class="demo">
    <div class="box orange button addcar">
      <div style="padding-top:55px">
      土豪,请猛击我,加入购物车
      </div>
    </div>
  </div>
  </div>
  <div class="m-sidebar">
    <div class="cart">
      <i id="end"></i>
      <span>购物车</span>
    </div>
  </div>
</div>
</body>
3、css样式:
<style type="text/css">
.demo{width:820px; margin:60px auto 10px auto}
.m-sidebar{position: fixed;top: 0;right: 0;background: #000;z-index: 2000;width: 85px;height: 100%;font-size: 12px;color: #fff;}
.cart{color: #fff;text-align:center;line-height: 20px;padding: 200px 0 0 0px;}
.cart span{display:block;width:20px;margin:10 0 0 0;}
.cart i{width:50px;height:35px;display:block; background:url(car.png) no-repeat;}
#msg{position:fixed; top:300px; right:35px; z-index:10000; width:1px; height:52px; line-height:52px; font-size:20px; text-align:center; color:#fff; background:#360; display:none}
.box{width:300px; height:150px; border:1px solid #e0e0e0; text-align:center}
.u-flyer{display: block;width: 50px;height: 50px;border-radius: 50px;position: fixed;z-index: 9999;}
.button {
  display: inline-block;
  outline: none;
  cursor: pointer;
  text-align: center;
  text-decoration: none;
  font: 16px/100% 'Microsoft yahei',Arial, Helvetica, sans-serif;
  padding: .5em 2em .55em;
  text-shadow: 0 1px 1px rgba(0,0,0,.3);
  -webkit-border-radius: .5em;
  -moz-border-radius: .5em;
  border-radius: .5em;
  -webkit-box-shadow: 0 1px 2px rgba(0,0,0,.2);
  -moz-box-shadow: 0 1px 2px rgba(0,0,0,.2);
  box-shadow: 0 1px 2px rgba(0,0,0,.2);
}
.button:hover {
  text-decoration: none;
}
.button:active {
  position: relative;
  top: 1px;
}
/* orange */
.orange {
  color: #fef4e9;
  border: solid 1px #da7c0c;
  background: #f78d1d;
  background: -webkit-gradient(linear, left top, left bottom, from(#faa51a), to(#f47a20));
  background: -moz-linear-gradient(top, #faa51a, #f47a20);
  filter: progid:DXImageTransform.Microsoft.gradient(startColorstr='#faa51a', endColorstr='#f47a20');
}
.orange:hover {
  background: #f47c20;
  background: -webkit-gradient(linear, left top, left bottom, from(#f88e11), to(#f06015));
  background: -moz-linear-gradient(top, #f88e11, #f06015);
  filter: progid:DXImageTransform.Microsoft.gradient(startColorstr='#f88e11', endColorstr='#f06015');
}
.orange:active {
  color: #fcd3a5;
  background: -webkit-gradient(linear, left top, left bottom, from(#f47a20), to(#faa51a));
  background: -moz-linear-gradient(top, #f47a20, #faa51a);
  filter: progid:DXImageTransform.Microsoft.gradient(startColorstr='#f47a20', endColorstr='#faa51a');
}
4、核心的JQuery代码:
<script>
//实现购物车+1动画效果
(function ($) {
  $.extend({
    tipsBox: function (options) {
      options = $.extend({
        obj: null, //jq对象,要在那个html标签上显示
        str: "+1", //字符串,要显示的内容
        startSize: "18px", //动画开始的文字大小
        endSize: "38px",  //动画结束的文字大小
        interval: 600, //动画时间间隔
        color: "red",  //文字颜色
        callback: function () { }  //回调函数
      }, options);
      $("body").append("<span class='num'>" + options.str + "</span>");
      var box = $(".num");
      var left = options.obj.offset().left + options.obj.width() / 2;
      var top = options.obj.offset().top - options.obj.height();
      box.css({
        "position": "absolute",
        "left": left + "px",
        "top": top + "px",
        "z-index": 9999,
        "font-size": options.startSize,
        "line-height": options.endSize,
        "color": options.color
      });
      box.animate({
        "font-size": options.endSize,
        "opacity": "0",
        "top": top - parseInt(options.endSize) + "px"
      }, options.interval, function () {
        box.remove();
        options.callback();
      });
    }
  });
})(jQuery);
function niceIn(prop){
  prop.find('i').addClass('niceIn');
  setTimeout(function(){
    prop.find('i').removeClass('niceIn');
  },1000);
}
//实现抛物线动画功能
$(function() {
  var offset = $("#end").offset();
  $(".addcar").click(function(event){
    var addcar = $(this);
    var img = "images/lg.jpg";
    var flyer = $('<img class="u-flyer" src="'+img+'">');
    flyer.fly({
      start: {
        left: event.pageX,
        top: event.pageY
      },
      end: {
        left: offset.left+10,
        top: offset.top+10,
        width: 0,
        height: 0
      },
      onEnd: function(){
        $.tipsBox({
            obj: $("#end"),
            str: "<b style='font-family:Microsoft YaHei;'>+1</b>",
            callback: function () {
            }
        });
        niceIn($("#end"));
      }
    });
  });
});
</script>
以上所述是小编给大家介绍的jQuery模拟实现天猫购物车动画效果实例代码,希望对大家有所帮助,如果大家有任何疑问请给我留言,小编会及时回复大家的。在此也非常感谢大家对小牛知识库网站的支持!
-
本文向大家介绍jQuery实现加入购物车飞入动画效果,包括了jQuery实现加入购物车飞入动画效果的使用技巧和注意事项,需要的朋友参考一下 HTML 首先载入jQuery库文件和jquery.fly.min.js插件。 接着,将商品信息html结构布置好,本例中,我们用四个商品并排布置,每个商品box中包括有商品图片、价格、名称以及加入购物车按钮等信息。 然后,我们还需要在页面的右侧加上购物车以及
-
本文向大家介绍jQuery实现购物车表单自动结算效果实例,包括了jQuery实现购物车表单自动结算效果实例的使用技巧和注意事项,需要的朋友参考一下 本文实例讲述了jQuery实现购物车表单自动结算效果。分享给大家供大家参考。具体如下: 这里jQuery实现购物车表单自动结算,只要用户把所购商品的数量输入进去,就可以适时计算出商品总额,金额+运费,类似淘宝的购物车结算功能,计算过程是适时的,用jqu
-
本文向大家介绍详解Android实现购物车页面及购物车效果(点击动画),包括了详解Android实现购物车页面及购物车效果(点击动画)的使用技巧和注意事项,需要的朋友参考一下 本文介绍了Android实现购物车页面及购物车效果(点击动画),分享给大家,具体如下: 效果图如下: 思路: (1)思考每个条目中的数字的更新原理。 (2)购物车的动画效果。 (3)购物清单怎么显示(这个我暂时没有写,如果需
-
本文向大家介绍vue框架制作购物车小球动画效果实例代码,包括了vue框架制作购物车小球动画效果实例代码的使用技巧和注意事项,需要的朋友参考一下 最近在学习前端制作了一个购物车小球的动画效果 直接上图看看效果 下面介绍一下制作这个动画的详细过程: 1.因为使用vue锁业需要使用transition标签包裹 并指定动画三个动画生命周期函数 样式设置成一个红色的小球采用absolute定位确保不影响页面
-
本文向大家介绍Android实现添加商品到购物车动画效果,包括了Android实现添加商品到购物车动画效果的使用技巧和注意事项,需要的朋友参考一下 本文实例为大家分享了Android添加商品到购物车的具体代码,供大家参考,具体内容如下 实现需求 在商品列表页面中,从列表item添加商品时,实现一个动画,给人感觉像是在添加商品到购物车。 思路 1、获取各个动画执行对象的起点和终点的坐标,利用Path
-
本文向大家介绍IOS购物车界面实现效果示例,包括了IOS购物车界面实现效果示例的使用技巧和注意事项,需要的朋友参考一下 购物软件不可避免有添加购物车的页面,那么购物车功能是怎么实现的呐?这里提供一种简单的思路,插入本地数据库。 先看效果 页面结构 本页面是由一个tableview和底部的底部的bottomView构成 底部的bottomView上有按钮,也可以添加其他属性,比如总价格,总重量等参数
-
本文向大家介绍iOS添加购物车动画效果示例,包括了iOS添加购物车动画效果示例的使用技巧和注意事项,需要的朋友参考一下 一、计算动画开始结束点位置 方法: 1) 动画开始位置fromCenter 2)动画结束位置endCenter 二、计算贝塞尔曲线(抛物线)的两个控制点 controlPoint1是控制点1 controlPoint2是控制点2 A是controlPoint1和controlPo
-
本文向大家介绍react-native 实现购物车滑动删除效果的示例代码,包括了react-native 实现购物车滑动删除效果的示例代码的使用技巧和注意事项,需要的朋友参考一下 购物车的功能基本上电商项目都会有的,这是一篇关于react-native的,原生android的已经好久没写了。记得以前写原生购物车的时候,遇到过产品的灵魂质问,为啥iOS的滑动删除可以,android却那么难实现的。这

