Java +Tomcat + SpringMVC实现页面访问示例解析
window7下Java环境安装记录:
一、安装Tomcat
1、下载tomcat 7.0,解压,无需安装,放置到目录:D:\apache-tomcat-7.0.90。
2、配置系统环境变量,CATALINA_BASE=D:\apache-tomcat-7.0.90,CATALINA_HOME=D:\apache-tomcat-7.0.90,在Path中新增“%CATALINA_HOME%\lib;%CATALINA_HOME%\bin”的环境变量。
3、进入D:\apache-tomcat-7.0.90\bin,执行startup启动tomcat,浏览器中输入“127.0.0.1:8080”即可查看是否成功。
二、使用SpringMVC搭建页面
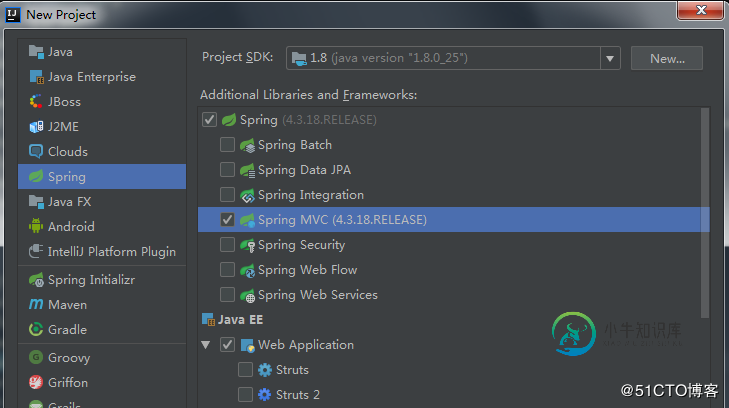
1、使用Idea创建SpringMVC工程,webAppTest2

2、修改web/WEB-INF/web.xml的url规则为接受所有
<?xml version="1.0" encoding="UTF-8"?>
<web-app xmlns="http://xmlns.jcp.org/xml/ns/javaee"
     xmlns:xsi="http://www.w3.org/2001/XMLSchema-instance"
     xsi:schemaLocation="http://xmlns.jcp.org/xml/ns/javaee http://xmlns.jcp.org/xml/ns/javaee/web-app_4_0.xsd"
     version="4.0">
  <context-param>
    <param-name>contextConfigLocation</param-name>
    <param-value>/WEB-INF/applicationContext.xml</param-value>
  </context-param>
  <listener>
    <listener-class>org.springframework.web.context.ContextLoaderListener</listener-class>
  </listener>
  <servlet>
    <servlet-name>dispatcher</servlet-name>
    <servlet-class>org.springframework.web.servlet.DispatcherServlet</servlet-class>
    <init-param>
      <param-name>contextConfigLocation</param-name>
      <param-value>classpath:dispatcher-servlet.xml</param-value>
    </init-param>
  </servlet>
  <servlet-mapping>
    <servlet-name>dispatcher</servlet-name>
    <url-pattern>/</url-pattern>
  </servlet-mapping>
</web-app>
3、在src下创建dispatcher-servlet.xml文件
<?xml version="1.0" encoding="UTF-8"?>
<beans xmlns="http://www.springframework.org/schema/beans"
    xmlns:xsi="http://www.w3.org/2001/XMLSchema-instance"
    xmlns:context="http://www.springframework.org/schema/context"
    xmlns:mvc="http://www.springframework.org/schema/mvc"
    xsi:schemaLocation="http://www.springframework.org/schema/beans http://www.springframework.org/schema/beans/spring-beans.xsd
    http://www.springframework.org/schema/context http://www.springframework.org/schema/context/spring-context-4.1.xsd
    http://www.springframework.org/schema/mvc http://www.springframework.org/schema/mvc/spring-mvc-4.1.xsd">

  <!-- scan the package and the sub package -->
  <context:component-scan base-package="test"/>

  <!-- don't handle the static resource -->
  <mvc:default-servlet-handler />

  <!-- if you use annotation you must configure following setting -->
  <mvc:annotation-driven />

  <!-- configure the InternalResourceViewResolver -->
  <bean class="org.springframework.web.servlet.view.InternalResourceViewResolver"
     id="internalResourceViewResolver">
    <!-- 前缀 -->
    <property name="prefix" value="/WEB-INF/jsp/" />
    <!-- 后缀 -->
    <property name="suffix" value=".jsp" />
  </bean>
</beans>
4、在src下创建test目录,目录下同时创建MyController文件
package test;

import org.springframework.stereotype.Controller;
import org.springframework.web.bind.annotation.RequestMapping;

@Controller
@RequestMapping("/mvc")
public class MyController {

  @RequestMapping("/hello")
  public String hello(){
    return "hello";
  }
}
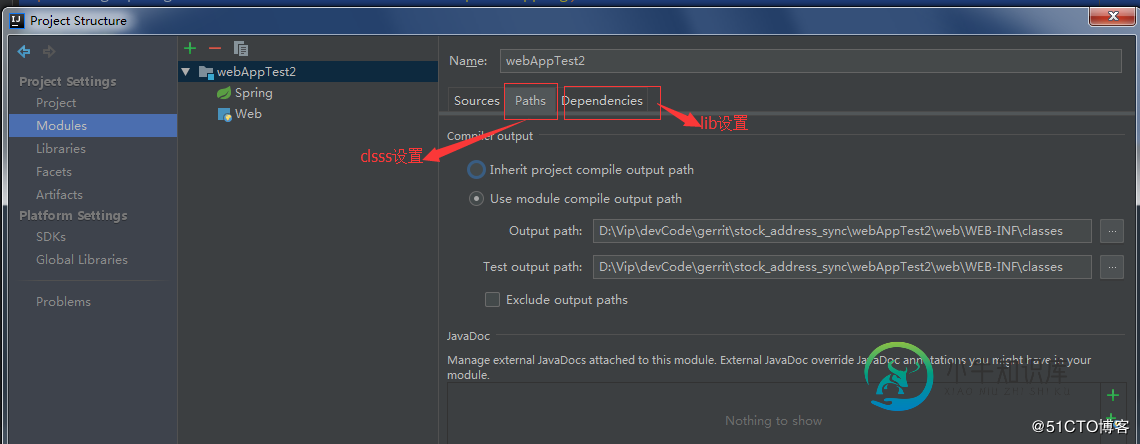
5、在web/WEB-INF下创建classes和lib文件夹,用来设置编译的.class文件目录和第三方依赖包目录。

6、web/WEB-INF/下创建jsp目录,并在目录下创建hello.jsp
<%@ page contentType="text/html;charset=UTF-8" language="java" %>
<html>
<head>
  <title>Title</title>
</head>
<body>
Hello world!!!!
</body>
</html>
7、打war包Build-->Build Artifacts,包名webAppTest2,放到D:\apache-tomcat-7.0.90\webapps目录下。
8、重启tomcat,访问http://127.0.0.1:8080/webAppTest2/mvc/hello 即可。

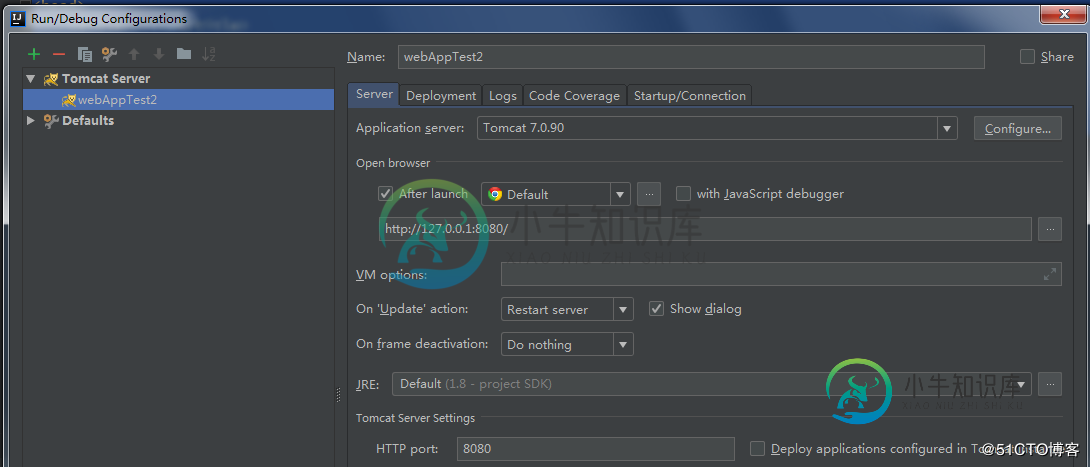
9、也可以设置Idea内置Tomcat,直接Idea内启动浏览器


10、省略工程名,直接访问即可

到此这篇关于Java +Tomcat + SpringMVC实现页面访问示例解析的文章就介绍到这了,更多相关Java Tomcat SpringMVC 页面访问内容请搜索小牛知识库以前的文章或继续浏览下面的相关文章希望大家以后多多支持小牛知识库!
-
本文向大家介绍SpringMVC+Mybatis实现的Mysql分页数据查询的示例,包括了SpringMVC+Mybatis实现的Mysql分页数据查询的示例的使用技巧和注意事项,需要的朋友参考一下 周末这天手痒,正好没事干,想着写一个分页的例子出来给大家分享一下。 这个案例分前端和后台两部分,前端使用面向对象的方式写的,里面用到了一些回调函数和事件代理,有兴趣的朋友可以研究一下。后台的实现技术是
-
本文向大家介绍Ajax实现对静态页面的文章访问统计功能示例,包括了Ajax实现对静态页面的文章访问统计功能示例的使用技巧和注意事项,需要的朋友参考一下 本文实例讲述了Ajax实现对静态页面的文章访问统计功能。分享给大家供大家参考,具体如下: 众所周知,静态页面不仅速度快,而且对seo也有一定的帮助。前些日子,写了一帖关于《在SAE平台实现WordPress页面纯静态化至KVDB》。我自己使用了一段
-
本文向大家介绍PHP实现通过文本文件统计页面访问量功能示例,包括了PHP实现通过文本文件统计页面访问量功能示例的使用技巧和注意事项,需要的朋友参考一下 本文实例讲述了PHP实现通过文本文件统计页面访问量功能。分享给大家供大家参考,具体如下: 一 代码 index.php gd1.php 二 运行结果 更多关于PHP相关内容感兴趣的读者可查看本站专题:《php文件操作总结》、《PHP运算与运算符用法
-
本文向大家介绍Java简单实现SpringMVC+MyBatis分页插件,包括了Java简单实现SpringMVC+MyBatis分页插件的使用技巧和注意事项,需要的朋友参考一下 1.封装分页Page类 2.封装分页插件 3.MyBatis配置文件:mybatis-config.xml 4.分页拦截器 5.Spring配置 6.SpringMVC配置拦截器
-
本文向大家介绍Java编程实现springMVC简单登录实例,包括了Java编程实现springMVC简单登录实例的使用技巧和注意事项,需要的朋友参考一下 Spring MVC属于SpringFrameWork的后续产品,已经融合在Spring Web Flow里面。Spring 框架提供了构建 Web 应用程序的全功能 MVC 模块。使用 Spring 可插入的 MVC 架构,从而在使用Spri
-
本文向大家介绍SpringMVC+bootstrap table实例详解,包括了SpringMVC+bootstrap table实例详解的使用技巧和注意事项,需要的朋友参考一下 bootstrap-table下载地址:https://github.com/wenzhixin/bootstrap-table/ 先来看一张效果图: 下载下来后,需要导入的css:由于需要bootstrap的支持,所以

