
Android实现滑动刻度尺效果

最近群里的开发人员咨询怎样实现刻度尺的滑动效果去选择身高体重等信息。给个横着的效果,自己试着去改编或者修改一下,看看通过自己的能力能不能做出竖着的效果来,过两天我再把竖着的那个滑动选择效果分享出来。废话不多说了,上代码。
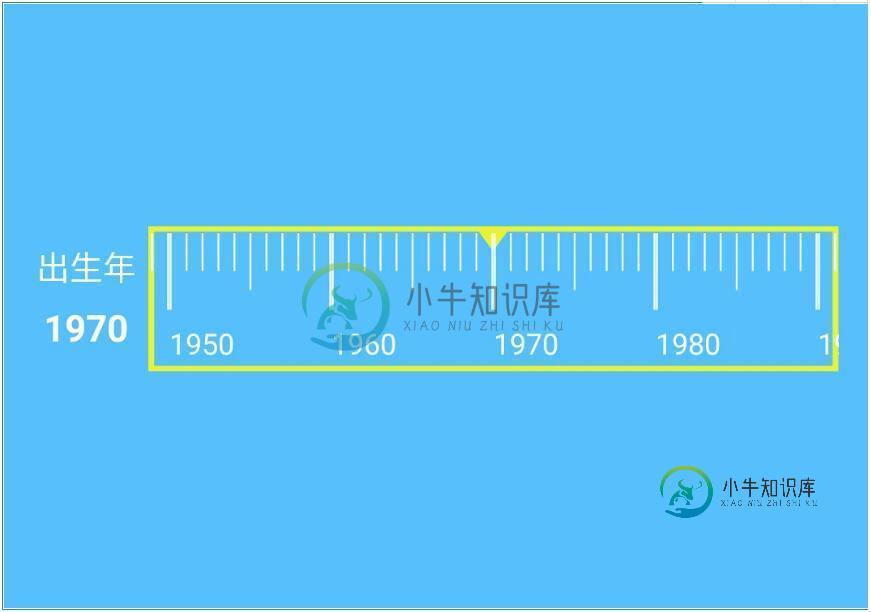
效果图如下:
第一步:activity_mian.xml布局:
<LinearLayout xmlns:android="http://schemas.android.com/apk/res/android"
xmlns:tools="http://schemas.android.com/tools"
android:layout_width="match_parent"
android:layout_height="match_parent"
android:background="@color/tab_blue"
android:gravity="center_vertical"
android:orientation="vertical"
tools:context=".MainActivity" >

<RelativeLayout
 android:layout_width="fill_parent"
 android:layout_height="wrap_content"
 android:layout_marginBottom="10dp"
 android:layout_marginLeft="15dp"
 android:layout_marginRight="15dp"
 android:layout_marginTop="10dp" >

 <LinearLayout
  android:id="@+id/two"
  android:layout_width="wrap_content"
  android:layout_height="wrap_content"
  android:layout_centerVertical="true"
  android:orientation="vertical" >

  <TextView
   android:layout_width="wrap_content"
   android:layout_height="wrap_content"
   android:layout_gravity="center_horizontal"
   android:text="出生年"
   android:textColor="@color/white"
   android:textSize="16sp" />

  <TextView
   android:id="@+id/user_birth_value"
   android:layout_width="wrap_content"
   android:layout_height="wrap_content"
   android:layout_gravity="center_horizontal"
   android:layout_marginTop="5dp"
   android:text="1972"
   android:textColor="@color/white"
   android:textSize="18sp"
   android:textStyle="bold" />
 </LinearLayout>

 <HorizontalScrollView
  android:id="@+id/birthruler"
  android:layout_width="fill_parent"
  android:layout_height="60dp"
  android:layout_centerVertical="true"
  android:layout_marginLeft="5dp"
  android:layout_toRightOf="@id/two"
  android:background="@drawable/birthday_ruler"
  android:scrollbars="none" >

  <LinearLayout
   android:id="@+id/ruler_layout"
   android:layout_width="wrap_content"
   android:layout_height="fill_parent"
   android:gravity="center_vertical"
   android:orientation="horizontal" >
  </LinearLayout>
 </HorizontalScrollView>
</RelativeLayout>

</LinearLayout>
第二步:水平空白刻度布局,blankhrulerunit.xml:
<RelativeLayout xmlns:android="http://schemas.android.com/apk/res/android"
android:layout_width="100dp"
android:layout_height="fill_parent"
android:layout_marginBottom="20dp"
android:background="@null"
android:orientation="vertical" >

<TextView
 android:id="@+id/hrulerunit"
 android:layout_width="100dp"
 android:layout_height="20dp"
 android:layout_alignParentBottom="true"
 android:layout_alignParentLeft="true"
 android:background="@null"
 android:textColor="@color/white"
 android:textSize="14sp" />

</RelativeLayout>
第三步:中间刻度尺布局,hrulerunit.xml:
<RelativeLayout xmlns:android="http://schemas.android.com/apk/res/android"
android:layout_width="fill_parent"
android:layout_height="fill_parent"
android:layout_marginBottom="20dp"
android:orientation="vertical" >
<ImageView
 android:layout_width="fill_parent"
 android:layout_height="fill_parent"
 android:layout_marginBottom="25dp"
 android:layout_marginTop="3dp"
 android:background="@null"
 android:contentDescription="@null"
 android:scaleType="fitXY"
 android:src="@drawable/rulerscale_horizontal" />
<TextView
 android:id="@+id/hrulerunit"
 android:layout_width="wrap_content"
 android:layout_height="20dp"
 android:layout_alignParentBottom="true"
 android:layout_alignParentLeft="true"
 android:background="@null"
 android:textColor="@color/white"
 android:textSize="14sp" />
</RelativeLayout>
第四步:MainActivity.java主代码实现:
package net.loonggg.rulerdemo;

import java.text.ParseException;
import java.text.SimpleDateFormat;
import java.util.Date;

import android.app.Activity;
import android.os.Bundle;
import android.os.Handler;
import android.view.LayoutInflater;
import android.view.MotionEvent;
import android.view.View;
import android.view.View.OnTouchListener;
import android.view.ViewGroup.LayoutParams;
import android.widget.HorizontalScrollView;
import android.widget.LinearLayout;
import android.widget.TextView;

public class MainActivity extends Activity {
private HorizontalScrollView ruler;
private LinearLayout rulerlayout, all_layout;
private TextView user_birth_value;
private int beginYear;

private String birthyear = "1970";
private long time = 0;
private int screenWidth;
private boolean isFirst = true;

@Override
protected void onCreate(Bundle savedInstanceState) {
 super.onCreate(savedInstanceState);
 setContentView(R.layout.activity_main);
 user_birth_value = (TextView) findViewById(R.id.user_birth_value);
 user_birth_value.setText("1970");
 ruler = (HorizontalScrollView) findViewById(R.id.birthruler);
 rulerlayout = (LinearLayout) findViewById(R.id.ruler_layout);
 ruler.setOnTouchListener(new OnTouchListener() {
  @Override
  public boolean onTouch(View v, MotionEvent event) {
   int action = event.getAction();
   user_birth_value.setText(String.valueOf(beginYear
     + (int) Math.ceil((ruler.getScrollX()) / 20)));
   switch (action) {
   case MotionEvent.ACTION_DOWN:
   case MotionEvent.ACTION_MOVE:
    break;
   case MotionEvent.ACTION_UP:
    new Handler().postDelayed(new Runnable() {
     @Override
     public void run() {
      user_birth_value.setText(String.valueOf(beginYear
        + (int) Math.ceil((ruler.getScrollX()) / 20)));
      birthyear = String.valueOf((int) (beginYear + Math
        .ceil((ruler.getScrollX()) / 20)));
      try {
       time = (new SimpleDateFormat("yyyy")
         .parse(String.valueOf(birthyear)))
         .getTime();
      } catch (ParseException e) {
       e.printStackTrace();
      }
     }
    }, 1000);
    break;
   }
   return false;
  }
 });
}
@Override
public void onWindowFocusChanged(boolean hasFocus) {
 super.onWindowFocusChanged(hasFocus);
 if (isFirst) {
  screenWidth = ruler.getWidth();
  constructRuler();
  isFirst = false;
 }
}
@Override
protected void onResume() {
 super.onResume();
 new Handler().postDelayed(new Runnable() {
  @Override
  public void run() {
   scroll();
  }
 }, 100);
}
private void scroll() {
 ruler.smoothScrollTo((1970 - beginYear) * 20, 0);
}
@SuppressWarnings("deprecation")
private void constructRuler() {
 int year = new Date().getYear();
 if (year < 2015)
  year = 2010;
 beginYear = year / 10 * 10 - 150;
 View leftview = (View) LayoutInflater.from(this).inflate(
   R.layout.blankhrulerunit, null);
 leftview.setLayoutParams(new LayoutParams(screenWidth / 2,
   LayoutParams.MATCH_PARENT));
 rulerlayout.addView(leftview);
 for (int i = 0; i < 16; i++) {
  View view = (View) LayoutInflater.from(this).inflate(
    R.layout.hrulerunit, null);
  view.setLayoutParams(new LayoutParams(200,
    LayoutParams.MATCH_PARENT));
  TextView tv = (TextView) view.findViewById(R.id.hrulerunit);
  tv.setText(String.valueOf(beginYear + i * 10));
  rulerlayout.addView(view);
 }
 View rightview = (View) LayoutInflater.from(this).inflate(
   R.layout.blankhrulerunit, null);
 rightview.setLayoutParams(new LayoutParams(screenWidth / 2,
   LayoutParams.MATCH_PARENT));
 rulerlayout.addView(rightview);
}
}
以上就是本文的全部内容,希望对大家的学习有所帮助,也希望大家多多支持小牛知识库。
-
本文向大家介绍Android自定义RecyclerView实现不固定刻度的刻度尺,包括了Android自定义RecyclerView实现不固定刻度的刻度尺的使用技巧和注意事项,需要的朋友参考一下 本文实例为大家分享了自定义RecyclerView实现不固定刻度的刻度尺的具体代码,供大家参考,具体内容如下 ##不均匀刻度效果图 ##等比例刻度效果图 实现功能目前 1、实现类似日期/分类等大小不固定的
-
刻度尺组件。因为通过 RN Dimension('window').height 获取的屏幕高度(screenHeight),并不是真正的可视区域的高度,所以,导致弹框类组件(例如:SlideModal),在计算位置时发送错误,通过 Ruler 组件可以测量出真正的屏幕高度。(SlideModal 支持自定义 screenHeight) 该组件只能通过人工的方式,测量屏幕可视区域,如果要彻底解决屏
-
定义 刻度尺组件,滑动选取当前值。 图片展示 代码演示 import Rule from 'pile/dist/components/rule' const {RuleLine} = Rule <RuleLine /> 属性 参数 描述 数据类型 默认值 list 区间标记的数值与key值 array ... defaultValue 设置初始取值 number 170 back 回调函数
-
本文向大家介绍android viewpager实现竖屏滑动效果,包括了android viewpager实现竖屏滑动效果的使用技巧和注意事项,需要的朋友参考一下 Viewpager 横向滑动效果系统就自带了很多种,比如这个 效果 那如果做成竖屏的这种效果呢 。我百度过很多,效果都不是很好,有的代码特别多而且存在很多问题。我结合了以前别人的代码现在来教大家个简单的实现过程。 首先自定义Viewpa
-
本文向大家介绍Android实现探探图片滑动效果,包括了Android实现探探图片滑动效果的使用技巧和注意事项,需要的朋友参考一下 之前一段时间,在朋友的推荐下,玩了探探这一款软件,初玩的时候,就发现,这款软件与一般的社交软件如陌陌之类的大相径庭,让我耳目一新,特别是探探里关于图片滑动操作让人觉得非常新鲜。所以在下通过网上之前的前辈的经历加上自己的理解,也来涉涉水。下面是网上找的探探的原界面 当时
-
本文向大家介绍Android实现横向滑动卡片效果,包括了Android实现横向滑动卡片效果的使用技巧和注意事项,需要的朋友参考一下 最近项目上需要实现这样效果的一个页面,本来想找个现成的两下搞定,但是问了半天度娘也没招,索性自己琢磨琢磨(这里边也少不了同事的帮助),先把最终的效果图贴上: 理论上讲,其本质并不复杂,就是一个viewpager,但是第一次实现这样的效果还是要花些时间的,具体的代码如下