
分享Android中pullToRefresh的使用心得

pullToRefresh的导入
首先,点击new按钮 -> import Module

然后在 New Module界面选择已经在本地的含有源代码的pullToRefresh。

打开如下图所示的open Module Settings 按钮

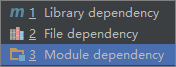
点击app中的Dependencies 中右边框的"+"按钮,选择第三个 ,如下所示

选择Modules : pullToRefreshLibrary ,点击OK
然后在build.gradle(Module:app)或者你自己要写的那个android 程序的根文件夹的build.gradle中加入下面一句话
compile project(':pullToRefreshLibrary')
自此,pullToRefresh已经导入成功,可以新建一个pullToRefrenshListView验证一下。
pullToRefreshListView的基本使用
pullToRefreshListView和ListView的使用基本差的不多,只不过ListView的xml要换成
com.handmark.pulltorefresh.library.PullToRefreshListView
例子如下:
<?xml version="1.0" encoding="utf-8"?>
<LinearLayout xmlns:android="http://schemas.android.com/apk/res/android"
  android:layout_width="match_parent"
  android:layout_height="match_parent"
  android:orientation="vertical">
  <com.handmark.pulltorefresh.library.PullToRefreshListView
    xmlns:ptr="http://schemas.android.com/apk/res-auto"
    android:layout_height="match_parent"
    android:layout_width="match_parent"
    android:id="@+id/refresh_list_view"
    ptr:ptrDrawable="@drawable/default_ptr_flip"
    ptr:ptrAnimationStyle="flip"
    ptr:ptrHeaderBackground="#383838"
    ptr:ptrHeaderTextColor="#FFFFFF" >
  </com.handmark.pulltorefresh.library.PullToRefreshListView>
</LinearLayout>
上面的例子中pullToRefreshListView中多了几个属性 分别以ptr开头,这是指定pullToRefreshListView在刷新的时候出现的特效,比如第一个是指定刷新时显示的图片,第二个是指定刷新的图片以何种方式显示出来,第三个是指定刷新时头部的背景,第四个是指定刷新时头部字体的颜色。
以上这些都可以在代码中设置。
ListView中每个item的xml还是不变的,adapter的使用和写法也是不变的,需要改变的只有设定刷新事件。
接下来在代码中设定pullToRefreshListView的一些基本属性和事件。
步骤一 绑定控件,设置属性
绑定控件代码如下:
 private PullToRefreshListView listview;
listview = (PullToRefreshListView) findViewById(R.id.refresh_list_view);
设置刷新时显示的刷新状态
 //对pullToListView绑定adapter
listview.setAdapter(adapter);
 /*设置pullToRefreshListView的刷新模式,BOTH代表支持上拉和下拉,PULL_FROM_END代表上拉,PULL_FROM_START代表下拉 */
listview.setMode(PullToRefreshBase.Mode.BOTH);
initRefreshListView();
initRefreshListView方法设置刷新显示的状态
 public void initRefreshListView() {
  ILoadingLayout Labels = listview.getLoadingLayoutProxy(true, true);
  Labels.setPullLabel("快点拉");
  Labels.setRefreshingLabel("正在拉");
  Labels.setReleaseLabel("放开刷新");
}
这里通过getLoadingLayoutProxy 方法来指定上拉和下拉时显示的状态的区别,第一个true 代表下来状态 ,第二个true 代表上拉的状态 。如果想区分上拉和下拉状态的不同,可以分别设置getLoadingLayoutProxy ,例子如下:
 public void initRefreshListView(){
  ILoadingLayout startLabels = pullToRefresh
        .getLoadingLayoutProxy(true, false);
  startLabels.setPullLabel("下拉刷新");
  startLabels.setRefreshingLabel("正在拉");
  startLabels.setReleaseLabel("放开刷新");
  ILoadingLayout endLabels = pullToRefresh.getLoadingLayoutProxy(
        false, true);
  endLabels.setPullLabel("上拉刷新");
  endLabels.setRefreshingLabel("正在载入...");
  endLabels.setReleaseLabel("放开刷新...");
这样pullToRefreshListView刷新时状态就设定好了。
步骤二 pullToRefreshListView监听事件的设置
这里主要设置setOnRefreshListener 事件,根据刚才设置的不同的刷新模式,在里面写的匿名内部类也不一样。
规则如下:
如果Mode设置成Mode.BOTH,需要设置刷新Listener为OnRefreshListener2,并实现onPullDownToRefresh()、onPullUpToRefresh()两个方法。
如果Mode设置成Mode.PULL_FROM_START或Mode.PULL_FROM_END,需要设置刷新Listener为OnRefreshListener,同时实现onRefresh()方法。
当然也可以设置为OnRefreshListener2,但是Mode.PULL_FROM_START的时候只调用onPullDownToRefresh()方法,Mode.PULL_FROM_END的时候只调用onPullUpToRefresh()方法.
这样在进入该Activity时候,手动上拉和下拉就会实现刷新和加载。
如果想刚进入Activity的时候就执行加载,则要调用如下方法
listview.setRefreshing();
接下来只需要在onPullDownToRefresh和onPullUpToRefresh 编写要获取listview新数据的方法。
我这里的例子如下:
 listview.setOnRefreshListener(new PullToRefreshBase.OnRefreshListener2<ListView>() {
   @Override
   public void onPullDownToRefresh(PullToRefreshBase<ListView> refreshView) {
      adapter.addToTop();
      new FinishRefresh().execute();
}
   @Override
   public void onPullUpToRefresh(PullToRefreshBase<ListView> refreshView) {
      adapter.addToBottom();
      new FinishRefresh().execute();
}
});
我这里在自定义的adapter中写了2个新方法 addToTop 和addToBottom 分别在头部加入数据和在尾部加入数据
方法如下:
private void addToTop() {
  for (int i = 0; i < 2; i++) {
     Item item = new Item();
     item.setText("在头部加入第" + i + "数据");
     item.setImageid(R.mipmap.ic_launcher);
     listItems.add(i, item);
  }
}
private void addToBottom() {
  for (int i = 0; i < 2; i++) {
     Item item = new Item();
     item.setText("在尾部加入第" + i + "数据");
     item.setImageid(R.mipmap.ic_launcher);
     listItems.add(item);
   }
}
这里并没有考虑去重的问题,就是每次刷新结束后会显示出刷新的结果,当再次刷新后,又会执行和上次一样的结果,实际上,这是不符合逻辑的,当第二次在刷新的时候应该进行判断,如果数据一样就不把数据加入到list当中。
接下来 new FinishRefresh().execute(); 是这里我比较疑惑的一个固定写法,在这个com.handmark.pulltorefresh.library.PullToRefreshListView 框架下,执行onRefreshComplete();方法必须在异步下执行,不能和主进程一起执行,如果直接在下拉,上拉监听方法中写入onRefreshComplete(); 则在实际刷新中刷新状态的显示header是不会收回去的,换句话说 刷新一直不会完成。
所以要在继承AsyncTask的类下调用onRefreshComplete();
 private class FinishRefresh extends AsyncTask<Void, Void, Void> {
    @Override
    protected Void doInBackground(Void... params) {
      try {
        Thread.sleep(1000);
      } catch (InterruptedException e) {

      }
      return null;
    }

    @Override
    protected void onPostExecute(Void aVoid) {
      listview.onRefreshComplete();
      adapter.notifyDataSetChanged();
    }
  }
至此,pullToRefreshListview就实现了简单的上拉,下拉使用
步骤三 pullToRefresListView 的其他监听方法
关于步骤三今天时间有限,先给大家分享到这里,后续持续更新。
-
本文向大家介绍js使用心得分享,包括了js使用心得分享的使用技巧和注意事项,需要的朋友参考一下 本人学习javascript时间也不是很长,目前就如下5点心得,后续慢慢更新。 1. 给未经声明的变量赋值在严格模式下会导致抛出 ReferenceError 错误(意思是,所有变量都必须用 var 去定义,不能在函数内部定义全局变量); 2. 在严格模式下,不能定义名为 eval 和 argument
-
android-pulltorefresh 是一个强大的拉动刷新开源项目,支持各种控件下拉刷新。 ListView、ViewPager、WevView、ExpandableListView、GridView、(Horizontal)ScrollView、Fragment上下左右拉动刷新,比下面johannilsson那个只支持ListView的强大的多。并且他实现的下拉刷新ListView在ite
-
该项目为 Android 应用提供一个向下滑动即刷新列表的功能。
-
本文向大家介绍使用python开发vim插件及心得分享,包括了使用python开发vim插件及心得分享的使用技巧和注意事项,需要的朋友参考一下 vim有各种强大的插件,这不仅归功于其提供的用来编写插件的脚本语言vimL,还得益于它良好的接口实现,从而支持python等语言编写插件。当vim编译时带有+python特性时就能使用python2.x编写插件,+python3则支持python3.x,可
-
本文向大家介绍使用mint-ui开发项目的一些心得(分享),包括了使用mint-ui开发项目的一些心得(分享)的使用技巧和注意事项,需要的朋友参考一下 Mint-ui: 1、Cell 开发过程中,有时需要修改mt-cell自带的icon和value的标签样式,这时我们可以在<mt-cell></mt-cell>内新添如下标签进行改写: mt-cell无法直接绑定v-click事件,修改做法可以在<
-
本文向大家介绍分享Android中ExpandableListView控件使用教程,包括了分享Android中ExpandableListView控件使用教程的使用技巧和注意事项,需要的朋友参考一下 本文采用一个Demo来展示Android中ExpandableListView控件的使用,如如何在组/子ListView中绑定数据源。直接上代码如下: 程序结构图: layout目录下的 main.x